Showing posts with label for kids. Show all posts

Friday, February 20, 2015

Listen To The Fabric

 I'm going to go out on a limb here and say something crazy: fabric talks to me. Sort of. I just stare at it for awhile and figure out what the fabric needs to become. I love picking fabrics, putting unusual prints together, and making bold prints work on small projects. I would pretty much be terrible at production line type work, because I am not even sure what the finished product will look like until I'm done.
 Take this dress, for example. I cut out the outside a few weeks ago, but never quite decided what to line it with. Today I made my decision, but i still didn't know what it needed to give it a little extra pizazz. I sewed up the bodice and decided on.....rick rack! Don't be hatin'. I haven't used it in like...two weeks. Which is a very long time for me. This fabric has a bit of lavender which needed to be played up, and the rick rack fit the bill. On another dress, I might add piping or a flower or two. I just go with the flow, man....
 Then there's this bow tie! I love this fabric and it needed to be made into a bow tie. Not the most exciting project, and sadly I couldn't figure out how to add rick rack without making myself look like a crazy person. Oh, too late you say? ;)
What about you? Does fabric talk to you, or are you one of those super organized people who plans everything out before they start?

Saturday, November 15, 2014

And Again....Another Apron

 Here's another one! I have so (sew) much fun picking out fabrics and trims and embellishments. I think that might be one of my favorite parts of the whole sewing process. Aprons are fun because you can get away with using a lot of fun/bright/funky stuff.
 Isn't this fabric the cutest? Snowmen, gingerbread and candy canes! It's so fun and cheerful.
 This one got a little wool felt gingerbread man on the pocket.
...And a little flair at the top! I have been using D-rings because they seem so much more manageable than tying and untying knots on wiggly kids.

Friday, November 14, 2014

Kids' Christmas Apron!

 I've had a spurt of random sewing projects lately, including Halloween costumes, birthday gifts and Etsy stuff. Perhaps one day I shall blog about it all, but no promises! :) I have about half a dozen kids aprons in progress right now. This one was my prototype and I love it! Basically, I want one for myself in grown-up size, but I have yet to find the justification to add yet another apron to my collection.
 I am working on a basic apron pattern with various 'customizations' so that each one can have its own personality. For this apron, I used this funky Christmas print as an accent with red bows and rick rack.
 I love that each apron can be unique and adapt to the style of the fabric, etc. Wait til you see the others I am working on! I have some fun ideas that will hopefully come to fruition. In the meantime, this cutie is up in the shop and ready to find itself a good home!
Rick rack and all....

Thursday, October 30, 2014

Sparkly Jack-O-Lantern Tutorial


In need of a last minute Halloween craft? Here is a fun one from the archives. I have my work cut out for me today finishing the kids' Halloween costumes. Stay tuned!


We received several jack-o-lantern pumpkins from our CSA share. I knew that if we carved them, they would be gone long before Halloween. I decided to do something different (and less messy) with them. To make these sparkly pumpkins, you will need a small piece of contact paper, white glue, a paint brush, glitter, and of course, pumpkins.


Begin by drawing your jack-o-lantern's features on the back of your contact paper.


Using sharp scissors, carefully cut out your stencil.


Peel the paper backing off and apply stencil to the pumpkin. Rub the edges down with your finger to make sure that there are no gaps. (You may have to 'pleat' the stencil a bit to get it to lay flat)

Using a paintbrush, spread glue over the design.


Sprinkle a generous helping of glitter over the glue. (Make sure to do this over a sheet of scratch paper to catch the extra glitter) Tap the pumpkin a few times to remove excess glitter.


Gently peel away the stencil and remove any stray glitter with a dry brush. Repeat for other features. (I used the same stencil for both eyes)


*You could spray the finished pumpkins with a sealer if you plan on keeping them outside.


Now you have yourself some sparkly, happy pumpkins!

Saturday, September 6, 2014

Vintage Sheet to Adorable Dress

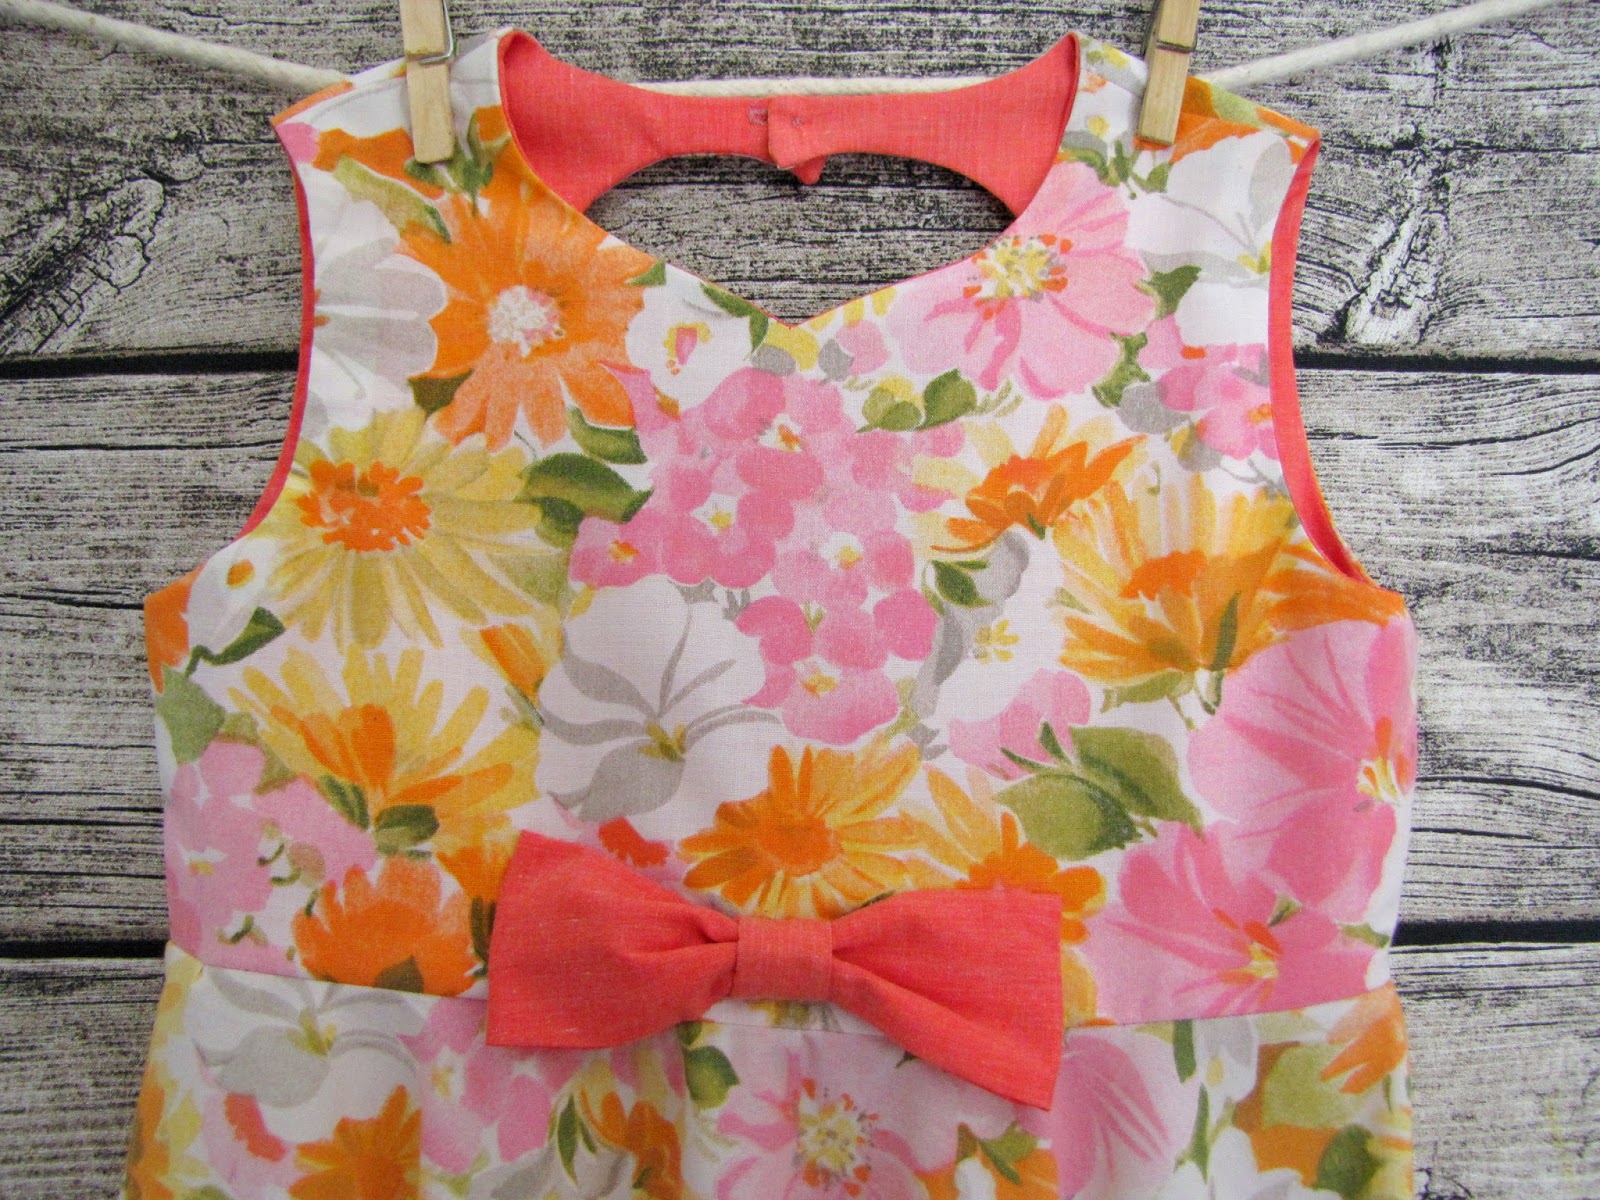
 Last month I found a lovely vintage sheet and knew I had to make something out of it. This one was in fabulous condition and I imagine it to have lived on some adorable old lady's guest bed. The colors are fun and cheery: pink and orange, tempered with white flowers and green leaves. It was such soft fabric with a fluid drape, and I knew it would make a great circle skirt.
 I lined it with some coral pink/red fabric I got at the same sale. It came to me as the most horribly sewn curtains I have ever seen. Seriously. I couldn't even figure out what they were trying to accomplish, but the fabric was in great shape.
 Instead of a fabric flower, I switched this one up a little and added a bow. I am so happy with how it turned out! I kind of wish I had made it in my size. Think there's enough fabric left? ;)
Of course, I added the heart cut-out in the back and finished it off with a vintage pink button. Hopefully this dress will find its way to a little girl who likes to twirl!

Friday, September 5, 2014

Lastest Projects: Buntings, Buntings and More Buntings!


Phew! We have really been lax about posting this summer, but I am happy to say I have been able to squeeze in some sewing time. Also, all three of my kids are in school this year (yikes!) which means I will be able to have more time to devote to sewing and adding things to the shop. I have been working on a stack of buntings which have been so much fun! I love coming up with fun and funky color combinations and seeing them all come together.


So far I have over a dozen finished and waiting to be photographed. They range from shabby chic prints to polka dots and pickles! 

This one is the first one up in the shop. I think it would be a great addition to a playroom or a kids' bedroom. Six or seven years ago, I made a bunting for our family. I have used it at every birthday and party and it is such a fun tradition!

Sunday, July 13, 2014

Sew-A-Thon

Last week I got the sewing bug. It's been too long! I cut out 4 baby dresses for Etsy, sewed them up, and finished two other dresses that needed finishing touches. Here are a few sneak peeks:


Yes, this one looks mighty familiar doesn't it? I liked the custom one I made so much I made another one!


Wednesday, July 9, 2014

Painting Party! Kids' Birthday Party

 A friend of mine recently asked if I would be interested in doing a painting lesson for her daughter's 8th birthday. Um, yes! Her daughter loves butterflies, so I came up with a pretty simple butterfly.
 I prepped the canvases by lightly spraying them blue, leaving plenty of white splotches for clouds. I was concerned that with the limitations of time and attention span, painting a background was out of the question. I guided them through, step by step, teaching them how to paint the butterfly section by section, how to use the end of their brush to make dots, and other little tricks.
 There were 18 girls at the party. That is a LOT of girls! It was so much fun to do, and they seemed to really love it. I had a hair dryer with me to dry the paint before did the designs on the wings. That worked out great. I had them use Martha Stewart craft paint, which is cheaper than 'artist' acrylic, but nicer than the cheapest acrylic you can get. I experimented a bit and found the advantages of the Martha Stewart brand were that it was thicker and could easily cover on the first coat. It also dried fairly quickly and had cool sparkly colors!
 When I came up with the image, I wanted something that would allow them to have good results, as well as allow them to use their creativity. I have found that often people are paralyzed by the idea that it has to look 'just like yours/mine/hers'. Only a few girls got hung up on that, and the rest of them seemed to really love being able to personalize their own paintings. Now they have their own masterpieces to take home!

Friday, June 20, 2014

Latest Etsy Addition: Itty Bitty Baby Dress


I just finished this custom order dress! I was asked to make a dress like this, but in yellow and a size up. I had no idea if the same fabric was available in yellow, and after a little searching I found that it was on back order everywhere. Drat! Then, I lucked out and found a yard on Ebay of all places. Yay!


I lined it with the same print as the original dress. It will be worn for family pictures, and the colors are navy and yellow. I love the color combo here. I have just enough fabric left I may be able to squeeze out one more dress. Or an apron. Like I need another apron.

The flowers are yo-yo's with vintage shell buttons I had in my stash. See! This is justification for having a large button stash...you just never know what you will need! :)

Monday, June 9, 2014


Despite seeing only half of Despicable Me, my son loves the minions. He was recently bored and we decided to make these little pet rocks. I saw the idea on Pinterest; someone had used them for party favors. To make them, we painted clean dry rocks with yellow acrylic paint. (spray paint would have worked beautifully also) When the paint was dry, we painted the pants. I used the end of a marker dipped in white paint for the eye. When that was dry, we used a fine point and regular sharpies to add the details. I sprayed them with varnish and they were done! The little ones we call MINIons. Ha!!! Both my other kids asked for a few, so we ended up making 6 in all. They like to carry them around in their pockets and take them outside. Quick, easy and cheap free! I think this is the perfect project to revisit in the summer time.

Tuesday, May 6, 2014

A Little Bling! Decorating Girls Shoes


Our mom has this uncanny ability to find free stuff. She finds stuff in people's trash, at yard sales, and who knows where else. I think these shoes came via a yard sale. They are nothing fancy, but brand new and the perfect blank canvas. My girl has wanted to decorate her own shoes for a while, but plain shoes are few and far between. This was the perfect opportunity to let her loose with the gems. Incidentally, I have pretty good luck at the thrift store and found a huge bag of these for 3 bucks!!!


We each did a pair, using LockTight craft glue for the gems. She took a more free spirited approach and covered up the excess glue with glitter. She is keeping one pair for herself and we are putting the other pair in our OCC shoeboxes!

Tuesday, April 29, 2014

First Sewing Project: Simple Gathered Skirt


My daughter is 6 years old and very eager to learn to sew. I have had her do a few hand sewing projects and her skills have improved little by little. She enjoys hand sewing, but of course she wanted to try the machine too! This skirt is her first 'official' sewing project. It really couldn't be more simple: a rectangle of fabric with a channel at the top for elastic, and a hem at the bottom. She is obsessed with the fancy stitches on my machine. She always tells me which one she thinks I should be using. For the hem, I let her pick a fancy stitch to sew on the lace. She is not big enough (or focused enough) to run the machine by herself so she sits in my lap and helps guide the fabric through. She mans the back-stitch button and removes the pins as we sew. I can't wait to see what sewing projects she will come up with in the future!

Thursday, April 24, 2014

Easter Dress: Quilt Inspired

 Every Easter I get a little giddy at the prospect of making a dress for my daughter. It's not that I do something fancy every year, but sewing for her is just fun! I have had the concept of this dress in my head for a while.

I love this style of quilt block, called a Dresden Plate, and I thought it would make a nice skirt. I also had these 30's prints to make a quilt for my girl and I figured it would be OK to 'borrow' a bit for this dress.


The skirt is roughly a half circle. I realized my math skills haven't improved much since high school, but I somehow calculated everything and it worked!


The skirt is fully lined, which looks pretty and makes sewing the scallops a bit easier. Each one still had to be clipped and carefully pressed, but it was manageable.


The bodice is sort of a highly evolved pattern I keep tracing off. This time I enlarged the heart opening in the back, and gave it a sweet heart neckline. I also widened it a bit since this girl is growing!


To finish it off, I added a fabric flower. Not sure if I'm sold on it yet, but twas the night before Easter and I ran out of inspiration. If I decide I can't live with it the way it is, I can always change it.


I really like the larger heart on this one. I keep tweaking it every time I make it.


Here's an up-close of  the flower.


This dress was definitely one of the more time consuming dresses I have made, but it was worth it! I have several ideas for more!

P.S. You will get 100 bonus points, redeemable for a big cyber high-five, if you noticed what I didn't add to this dress....so out of character for me!