
Showing posts with label for the house. Show all posts
Showing posts with label for the house. Show all posts
Monday, February 9, 2015
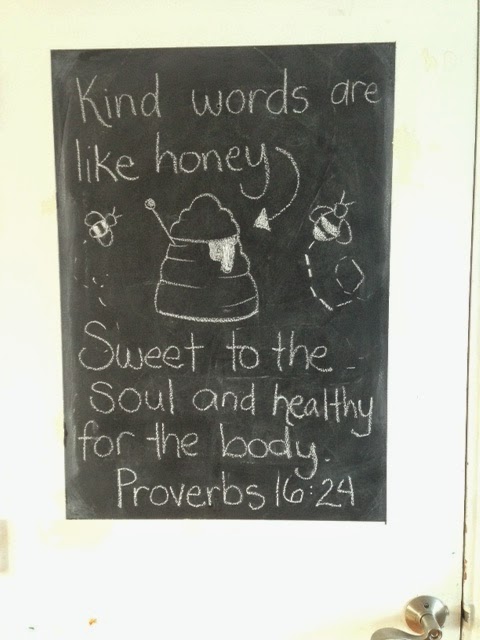
Chalkboard Door DIY

Saturday, September 20, 2014
Trash To Treasure Wreath

My mom has a special gift: she can sniff out good trash a mile away. One of her recent finds was a whole mess of high quality floral stems, still new and in boxes.She did what any self-respecting trash picker would do, and brought it all home. I 'rescued' some things from the stash, including a few bundles of wisteria stems.

I have always wanted to plant wisteria somewhere, but until that happens, I have this wreath! It is very simply made. The stems came with ivy and wire tendrils, which made it easy to braid it all together into a wreath. I love how easy it is to change the look of a front door by switching out a wreath!
Tuesday, July 1, 2014
Front Door Makeover
Yikes! I fell of the face of the crafty planet. I have not gotten a whole lot done lately, and what I have? Well, who wants to see how I hemmed a shirt from the thrift store? Exactly no one. But! I did get a wild hair and decided to repaint my door. I have wanted to for a long time. Our house's color scheme doesn't exactly lend itself to new color scheme (it is cream and brown...wha???). Alas, I decided to paint the door anyway because I can!

I chose a dark tealy-green color that I will also be using on my stair risers. Painting the door was pretty straight-forward. I won't bore you with the details. The decal I ordered from The Orange Sofa via Etsy. It took a while to get here, but it was cheap! Like, 5 bucks cheap.

I ordered silver because I was afraid the black wouldn't show up too well. I think it would have been fine but I like the silver too. Its fun!

The wreath is made from scrapbook paper and cardboard. Totally high tech. I made paper pinwheels and hot-glued them willy-nilly all over a cardboard ring.

The centers are buttons. Of which I have a few....hundred....or more. But now I have 8 less! I really want to make one of these in a red, white and blue version too!
I chose a dark tealy-green color that I will also be using on my stair risers. Painting the door was pretty straight-forward. I won't bore you with the details. The decal I ordered from The Orange Sofa via Etsy. It took a while to get here, but it was cheap! Like, 5 bucks cheap.
I ordered silver because I was afraid the black wouldn't show up too well. I think it would have been fine but I like the silver too. Its fun!
The wreath is made from scrapbook paper and cardboard. Totally high tech. I made paper pinwheels and hot-glued them willy-nilly all over a cardboard ring.
The centers are buttons. Of which I have a few....hundred....or more. But now I have 8 less! I really want to make one of these in a red, white and blue version too!
Wednesday, April 2, 2014
Creative Containers for Houseplants

I have always loved plants, although admittedly I took a long hiatus from houseplants. Something about producing 3 babies in 4 years. I couldn't stay away forever though, especially since I have the perfect twelve foot bay window in my living room.

I am sure you have noticed, though, that cute plant pots are hard to find and usually the price tag makes me want to cry a little. I mean, like a sucker you buy a new plant because 'it's only $4!!' only to shell out $20 on a pot. Sometimes, I use non-standard containers to use for my plants. I happen to like things with character, so my pots-on-the-cheap program fills two purposes. Here, I used a vintage marshmallow tin that has been bouncing around the family for many moons.

The pot on the left is a plain terra cotta pot I 'color blocked'. Aren't I just so trendy? ha! I have pictures for a tutorial...someday. The Christmas cactus in the center is in a vintage glass pitcher I found at a yard sale. The bucket was also scored at a yard sale.

Larger containers are a little more tricky. The giant metal can is an old vegetable shortening can which I salvaged from my parents' house. (Hmmm...is 'salvaged' the right word? Scavenged? Mooched?) It was already somewhat rusty, so I planted the money tree inside a Home Depot bucket and put it inside the can. The pot on the left was found at Home Goods for about $24 which was a great deal!
Now what are you waiting for? Go plant something!
Sunday, March 2, 2014
Mirror Makeover
Before Christmas, I found this mirror at the thrift store for $10.99. It is very well made, from Bombay Company and made in 1987 according to the tag.

 The mirror is beveled and easily removable which made this project a breeze. I was a good girl this time and sprayed on a thin layer of Zinzer primer first. That stuff is the best. I painted my kitchen backslash once using Zinzer and latex paint over it. Worked like a charm! After priming the mirror, I painted it emerald green.

 After the paint dried, I used the same technique I used with this frame. I painted black in all the crevices of the frame (very willy-nilly...this is not a situation that calls for precision). While the paint was wet, I took a damp washcloth and wiped most of it off, allowing the black paint to highlight the details.

 And there you have it! I plan to hang this funky thang in my living room one of these months. I have been itching to reconfigure my wall o' art & photos for the 19th time. Here is what the wall looked like about 3 iterations ago.
Tuesday, July 23, 2013
Quick and Simple Project
This project was so simple it almost shouldn't qualify. I adopted a giant lard can from my parents. I thought it was cool and originally we used it as a nightstand. At some point, I turned it into a laundry hamper. The only problem was that the inside was a bit rusty and I kept reminding myself to make a liner for it. The fabric was given to me by a friend who brought it back from a missions trip to Kenya. I have no idea what type of fabric it is, some type of cotton but it is so nice and drapey but not flimsy. Whatever it is, it worked nicely for this and is a fun reminder of our friend and her trips to Kenya.


(Airing our dirty laundry! ha!!!)
Friday, April 5, 2013
Quilt Block

Long ago, in a land far away, California to be exact, I was a nerdy teenager who spent hours holed up in my room teaching myself how to quilt. At some point, I made this quilt block as an experiment and hand quilted it. I never finished the binding and it ended up in the bottom of my stash o' random quilt blocks. Recently I dug it out and finished it. I plan on using it in the middle of my table, under a vase of flowers, most likely dandelions and onion grass my kids picked in the yard. :)
Thursday, June 21, 2012
IKEA Mirror Makeover


Thursday, March 22, 2012
Mirror

Wednesday, March 21, 2012
Pillow Makeover


Monday, October 24, 2011
Its An Amy Butler Explosion!


Thursday, April 7, 2011
Table Scarf-Thingy

For lack of better terminology, I made this quilted table scarf-thingy for a friend recently. This block was hanging around in my scrap drawer and I finally made it into something useful. It is machine quilted with Warm and Natural batting. I also had the remaining yardage I had used to make the quilt block, so I used it for the backing and binding.
Wednesday, March 30, 2011
Barn Window Project

Several years back, I hit the jackpot. (I suppose it depends on your perspective, but...:) I found a whole pile of really old windows on the curb. Around these parts, trash picking is a big past time. If its on the curb, its fair game. Although the curb in question was a on a busy road, I couldn't resist. I think I was with Mom, and we frantically packed window after window into the van. At some point, the owner of the place came out and told us that they were original windows from one of the farm buildings out back, the house being very old. (1700's if I remember correctly) We have since moved once or twice and I have carted a few of the windows with me, with my husband cheering all the way. OK. Maybe not that last part. Anyhow, long story short, I decided that redoing my son's room in a farm theme was the perfect occasion for a window! I added two hooks to the bottom, so he can hang his stuff there. Two of the panes were missing, so I hung a horse shoe and a cowboy ornament in those openings. In the other panes, I attached 5 by 7 prints to the outside of the glass so I could easily change them. I might regret that later, but since it is hanging in the room of boys, we had to make sure it could withstand Armageddon, or at least a monkey or two trying to repel from the hooks. Not that my kids would ever try such a thing! :) What I am trying to say is that that bad boy ain't coming off the wall unless its moving time, and certainly not to switch out pictures now and again! I am really happy with the way it came out, and it renews my desire to use up every single window I have in the attic.
Monday, February 28, 2011
Enough To Make a Preacher Swear!!

I just finished this pillow for Mom. The top went together very nicely. I used the tutorial here to paper piece the patches. That part was a lot of fun. However, when I went to put the thing together, I ran into a few problems. I bought a solid fabric for the border and the fabric was awful!! At the store it felt fine, but after washing it the sizing came off and it was pretty thin. When I tried to add some decorative stitching to border, it made a mess. When I went to pick the stitches out, it was even worse. The fabric practically disintegrated! I ended up cutting the border down by about 2 inches, and I used a different fabric for the back. I'm glad its done and I still have all my fingers intact!
Thursday, February 24, 2011
Zig Zag Pillow

This pillow is for Mom's birthday. Before you think I got all crazy and hand appliqued those zig zags on there, check out this tutorial. I can't believe how simple they really are to make. Now I want to add them to the bottom of an apron, just for fun. (Sorry if you just cringed at the mention of another apron! :)
Tuesday, February 22, 2011
Embroidered Tea Towel

Here is a tea towel I made last week for a gift. The towel is a vintage reproduction towel that is made by Aunt Martha's. Their towels have a nicer weight than a lot of other tea towels so I like to use them for embroidery.
Tuesday, February 15, 2011
Big Project: FINISHED!

I finished making curtains for my boys' room. My oldest son requested their room be a farmer room, and I found the perfect fabric for them at JoAnns. I had to make five panels to cover the windows, and I bought every bit of fabric they had. Still, after making the curtains and tabs, I threw out one 2" by 16" strip...that was all that was left! Talk about close. I am glad it worked out. Curtains are, in my book, no fun at all. It's like hemming pants. Not difficult, but about as thrilling as watching paint dry. The curtains are made from a canvas type home-dec fabric, and are lined with some sort of curtain lining (also from JoAnns). I am very glad to have these done, and hanging up! Makes me feel like I completed something, unlike the perpetual mountain of clothes that need to be washed/dried/folded/put away. :)
Tuesday, January 25, 2011
Silhouette Update


A while back I did some fabric silhouettes for my living room. I liked the fabric, but didn't love it. After seeing fat quarters on sale, I decided there was no good reason not to slap some flashy new fabric up there. The fusible web I used for the silhouettes is such that it doesn't really fuse permanently, a trait that would be highly annoying in any other application. However, it made it very easy to peel them off and iron them on to the new fabric. I still don't think I have found the 'perfect' fabric, especially the middle one, but for now its new and different.
Friday, December 3, 2010
Clothespin Bag

I used this tutorial to make a clothespin bag. This is a really quick project, and doesn't take much fabric either. I used scraps from another project. The trim is this funky vintage stuff I picked up somewhere. It is one of those trims that won't go with many things, but I think it works here. Instead of finishing the neckline with bias tape or fold-over braid, as the tutorial shows, I pressed the edge toward the right side of the fabric and then stitched the trim on. That gave me a neat finish with no raw edges. These bags could be used for so many things. I have one hanging in my kitchen to hold my canning jar rings. Another idea I have for this pattern is to scale it down and make several in varying shades of lavender to hang in my daughter's room. That way she could keep all her little trinkets in them.
Wednesday, October 13, 2010
Cloth Napkins


Having three kids means the potential for going through mountains of paper napkins in short order. I made these cloth napkins with odds and ends from my stash. So far I have made about 18, and I am looking for a total of about 3 dozen. The construction is very simple: 2 18" squares, right sides together, sew together leaving an opening, turn, press and top stitch.
Subscribe to:
Posts (Atom)